AWS S3 Backup Integration with ERPnext
ERPNext offers a excellent security feature that enables automatic system backups on an AWS server. This integration securely uploads MySQL database and file backups to an AWS S3 bucket.
.jpeg)
Overview
After setting up this integration, your system will automatically upload backups to the AWS server according to your scheduled settings. In the event of any issues, you can easily retrieve the backup files in .gz and .tar formats, allowing you to restore everything on a new system.
Pre-Requisite
- Sign in to the AWS console and set up your account.
- Create an S3 bucket, and generate an API key and Secret Access Key.
Steps to Set Up the S3 Bucket
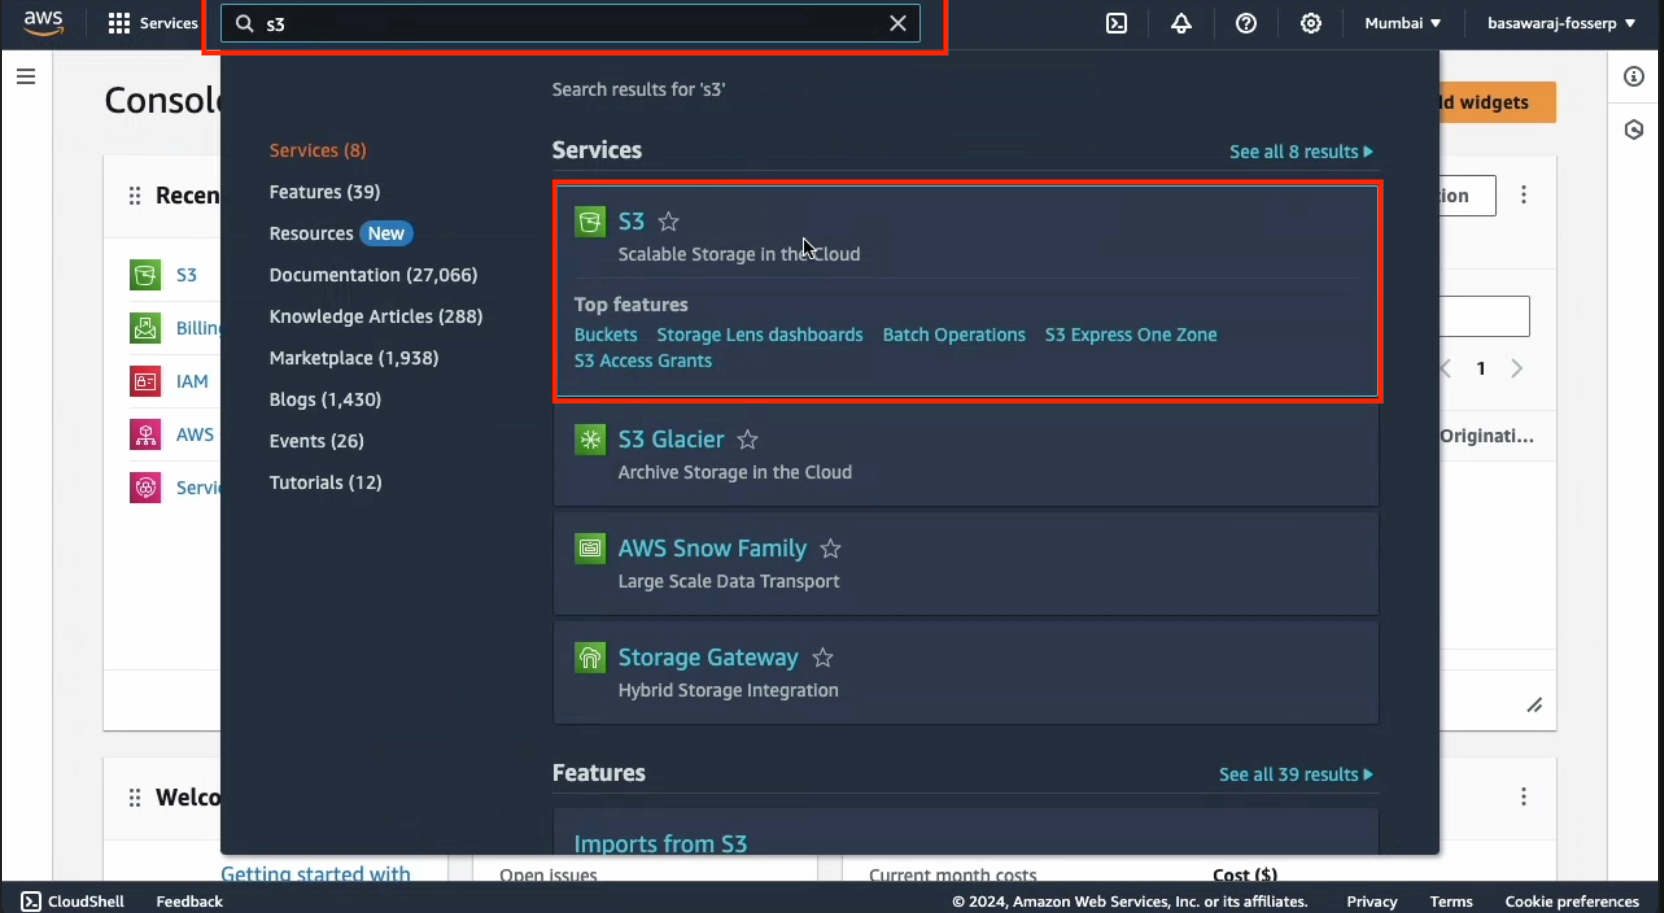
Access the S3 Service:
Log in to AWS and navigate to the S3 service. If you can’t find it, use the search bar to locate "S3".
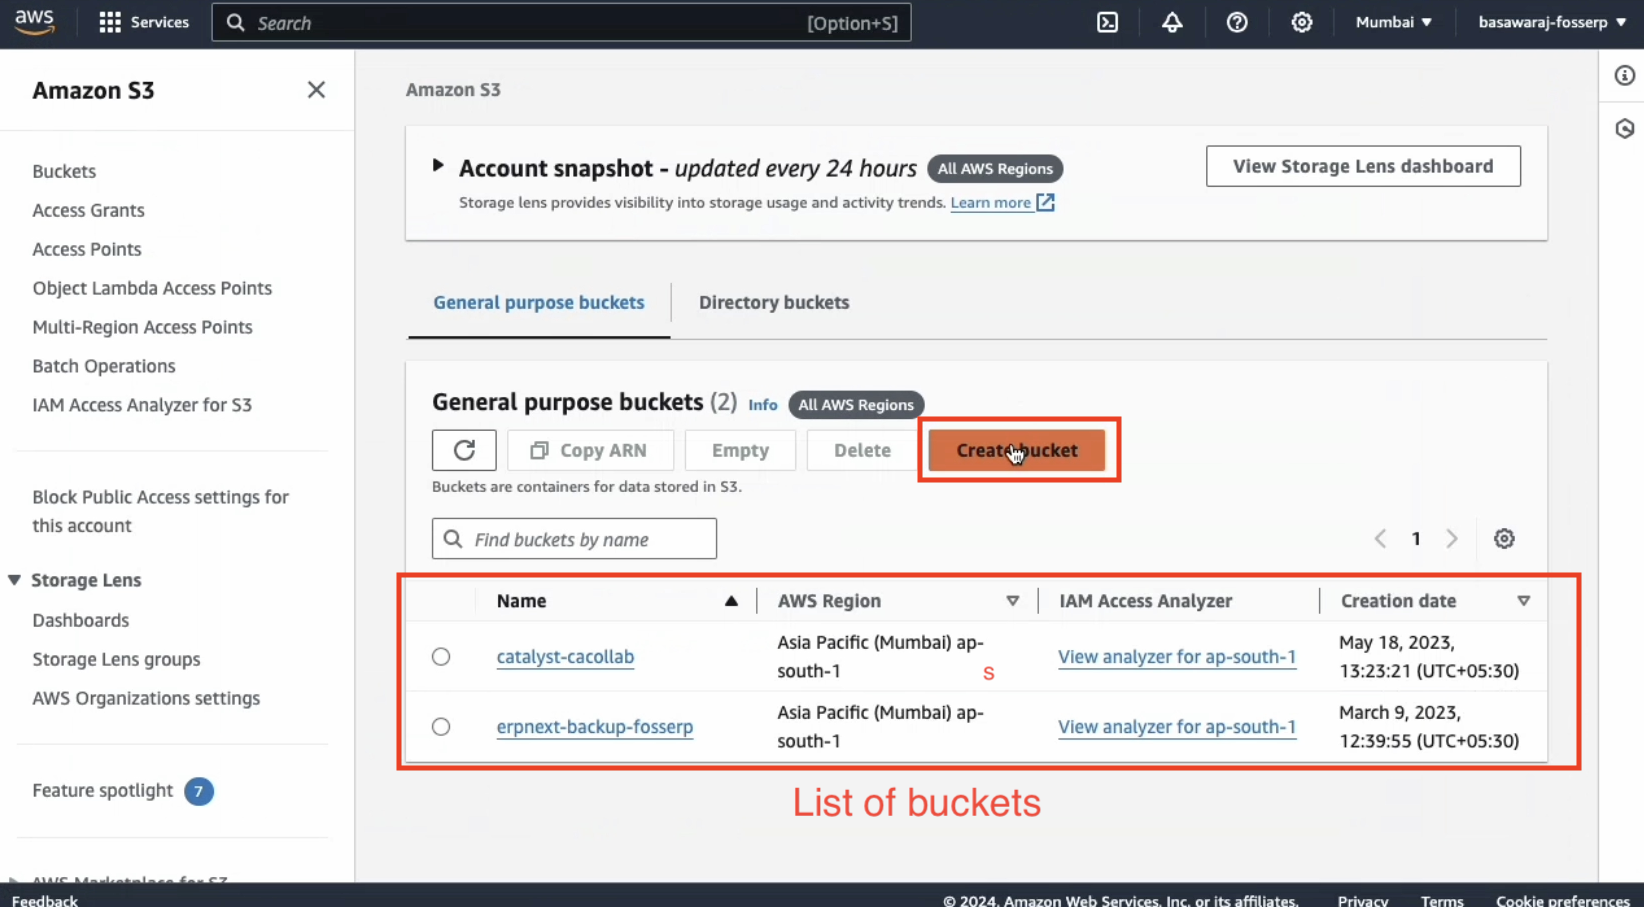
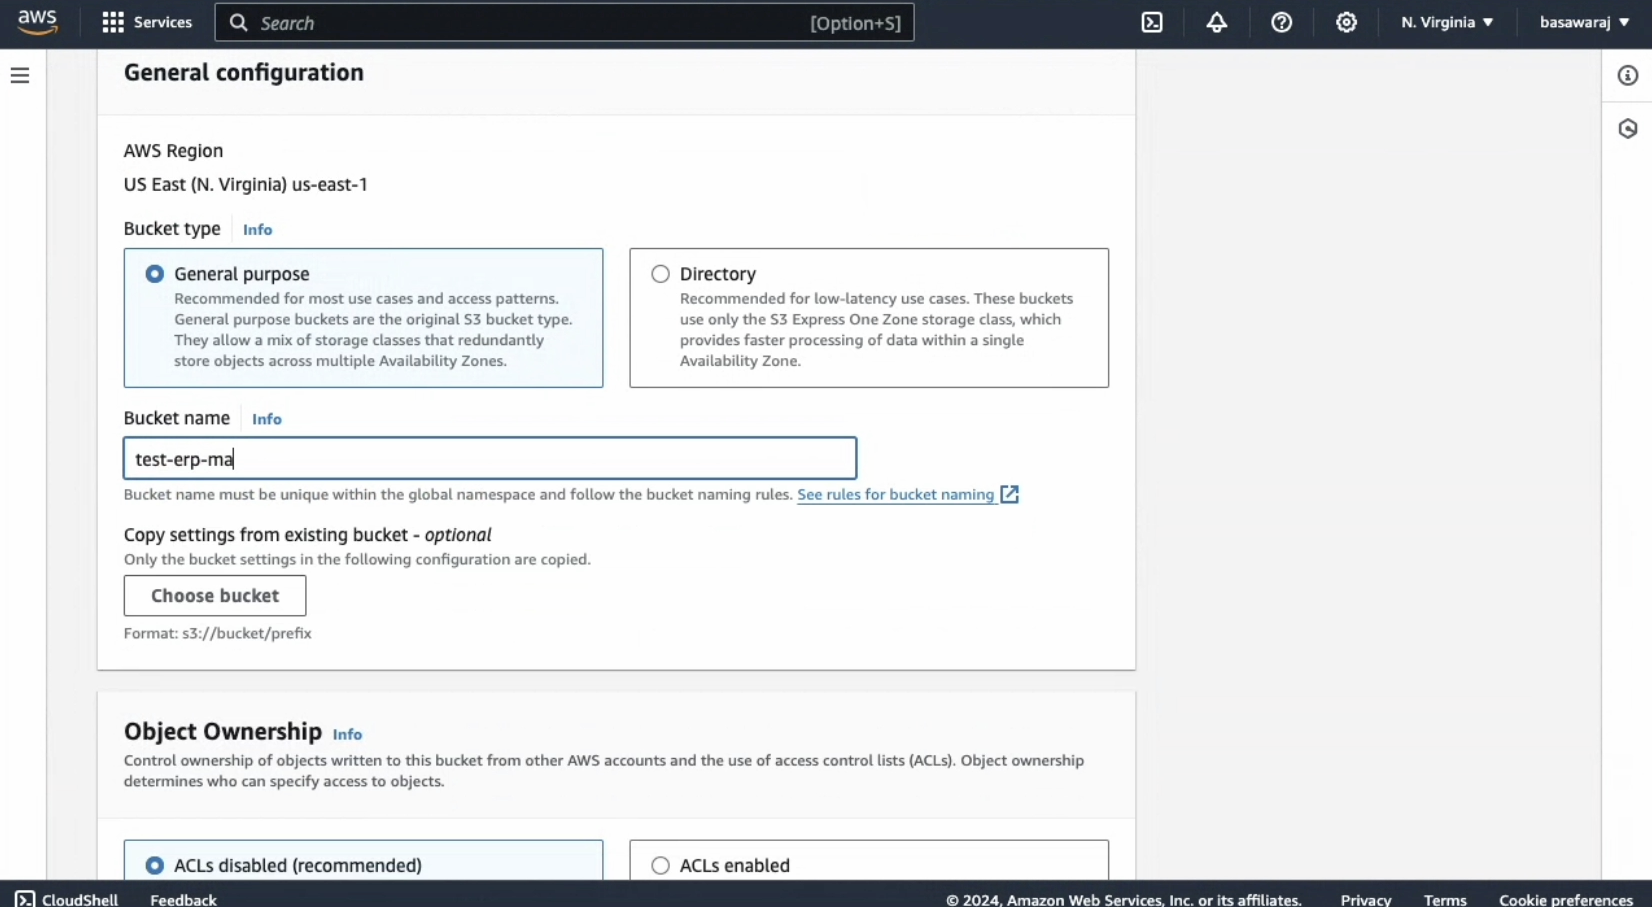
Create a New Bucket:
You’ll see a list of existing buckets and a button to create a new one. Keep all settings as default and name your bucket according to AWS naming rules:
- Ensure the name is unique within the partition, which is a collection of AWS Regions. Currently, AWS has three partitions: aws (Standard Regions), aws-cn (China Regions), and aws-us-gov (AWS GovCloud (US) Regions).
- The name must be between 3 and 63 characters long.
- Use only lowercase letters, numbers, hyphens (-), and dots (.), but avoid dots unless for static website hosting.
- The name must start and end with either a letter or a number.
Create an IAM Policy:
Navigate to Identity and Access Management (IAM) via the sidebar or search bar.
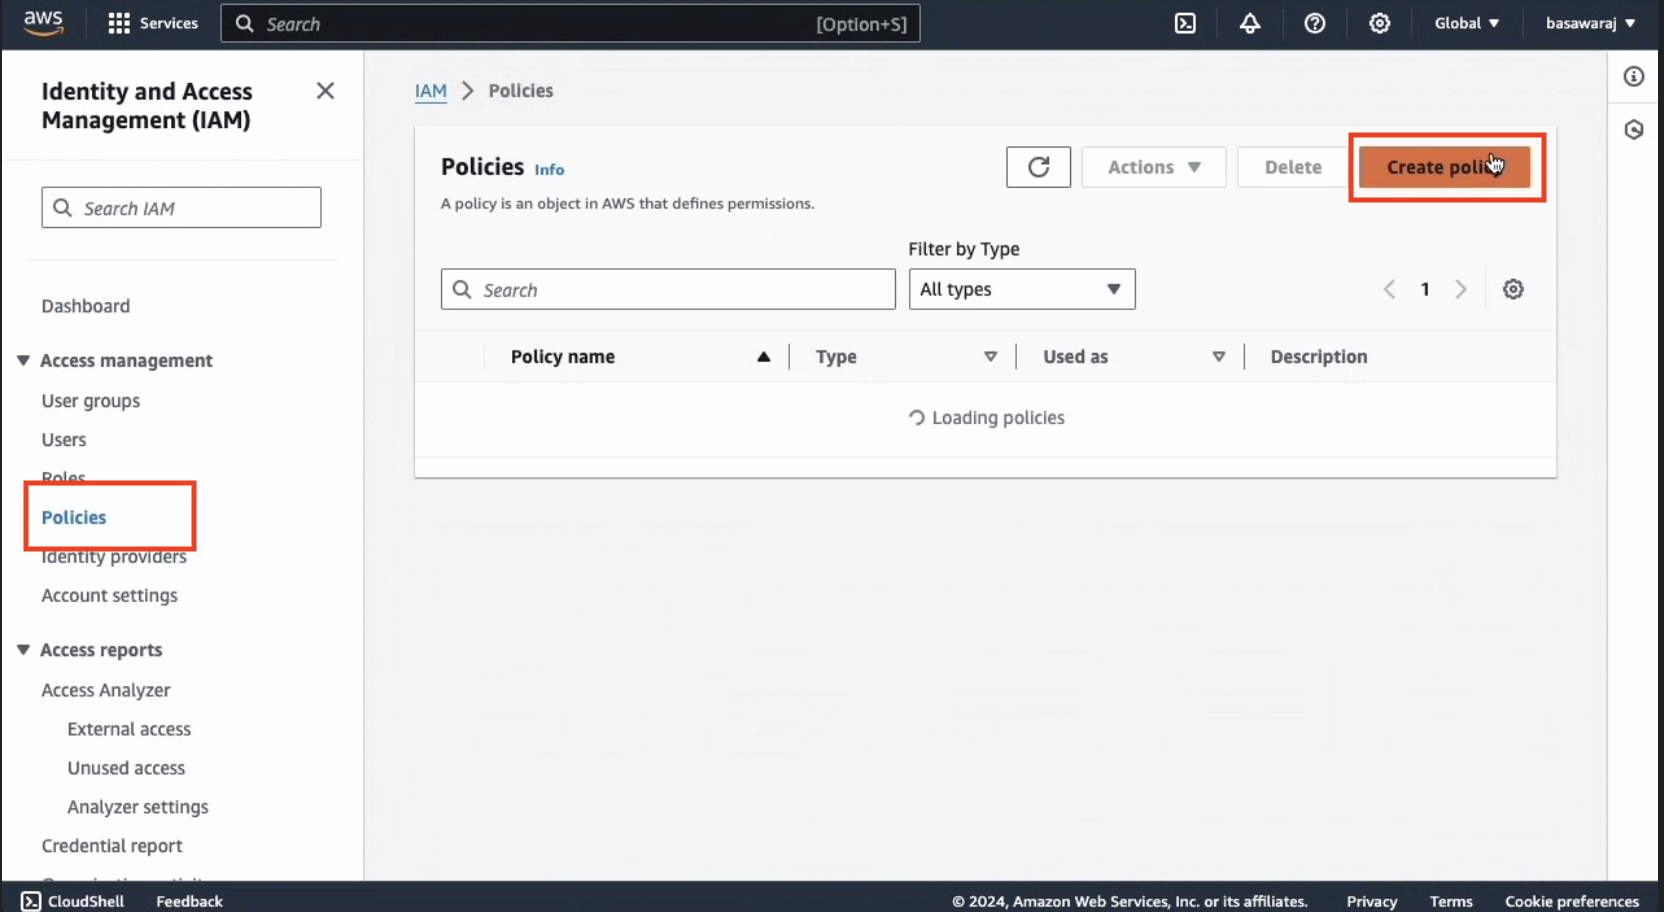
- Select the S3 service.
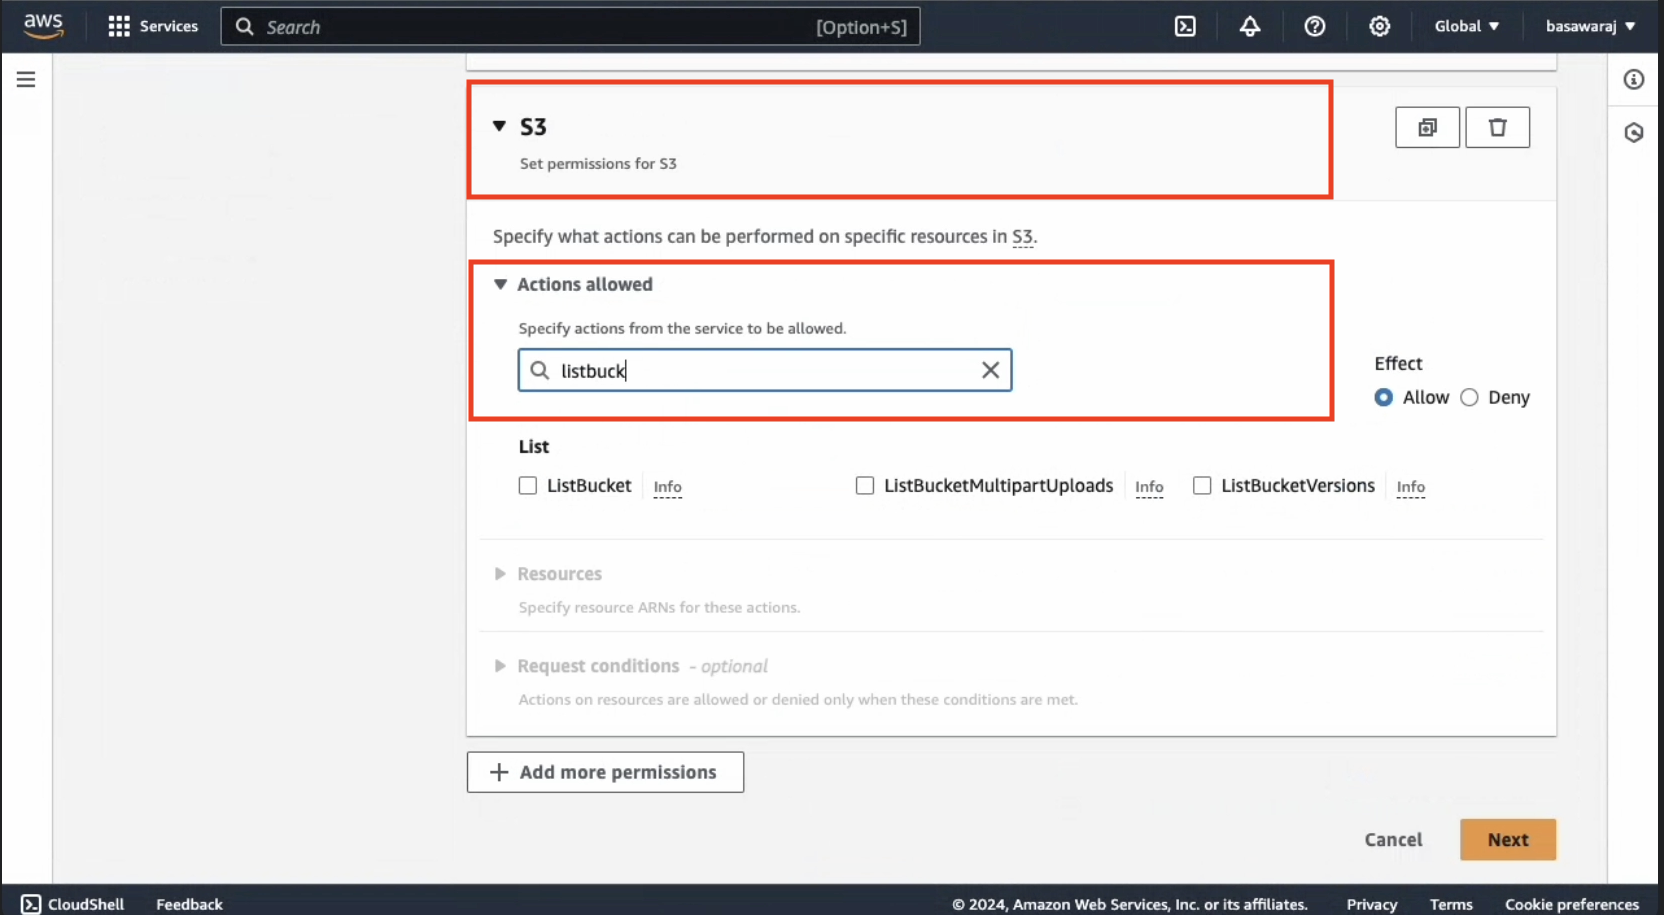
- Actions Allowed:In the filter, find and select the following actions:
- ListBucket
- PutObject
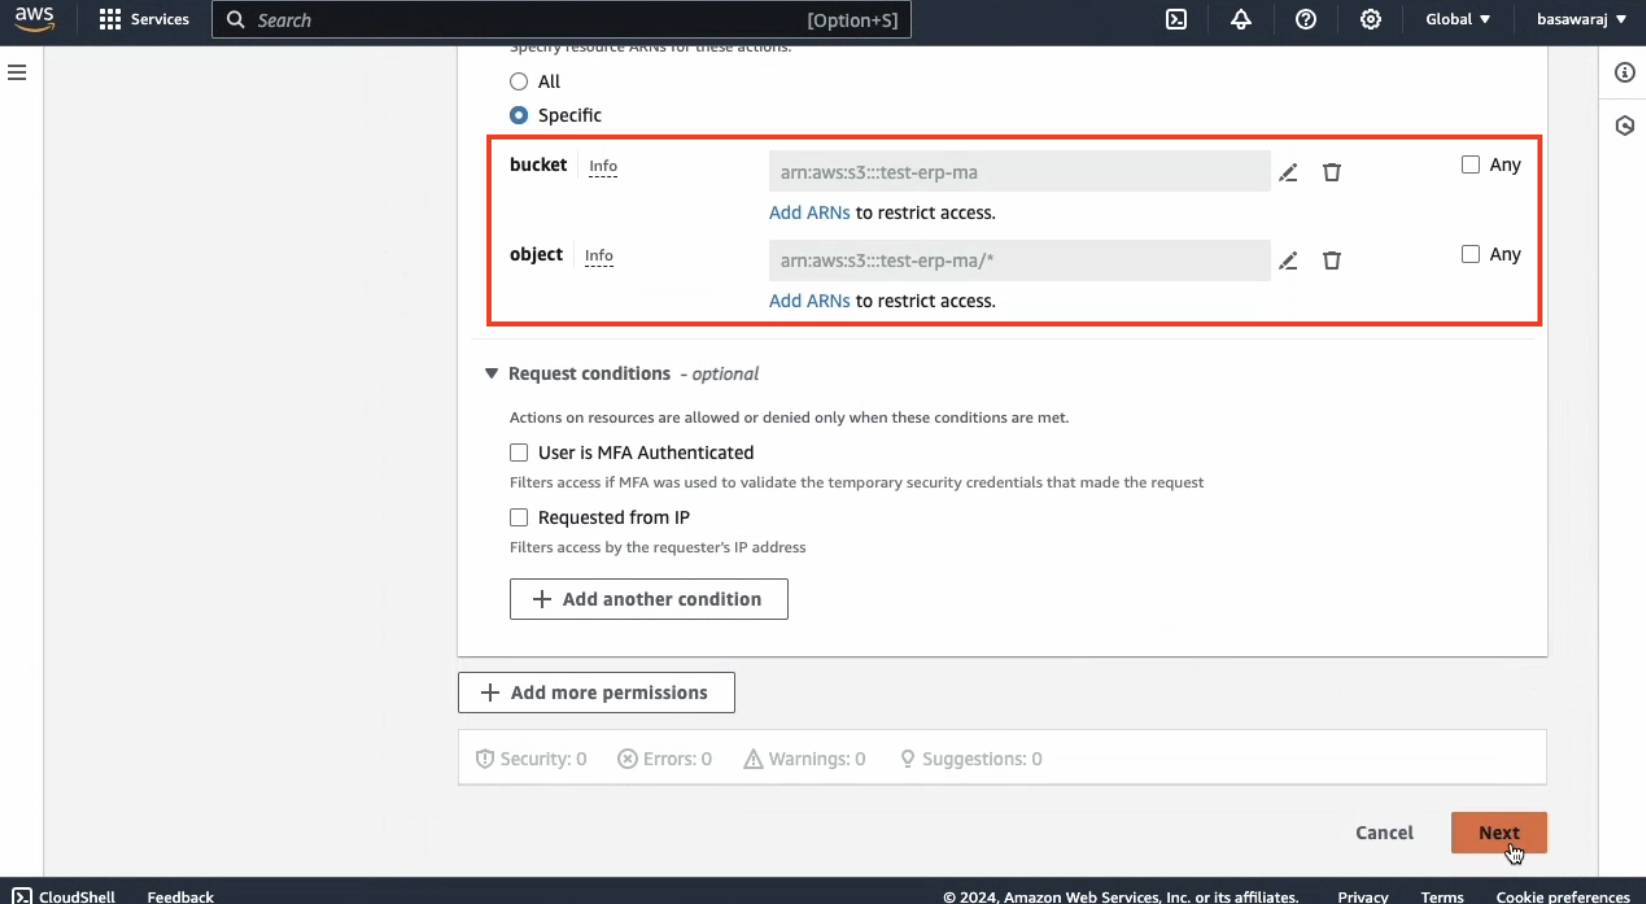
- In the resources section, add the ARN for both the bucket and the objects.
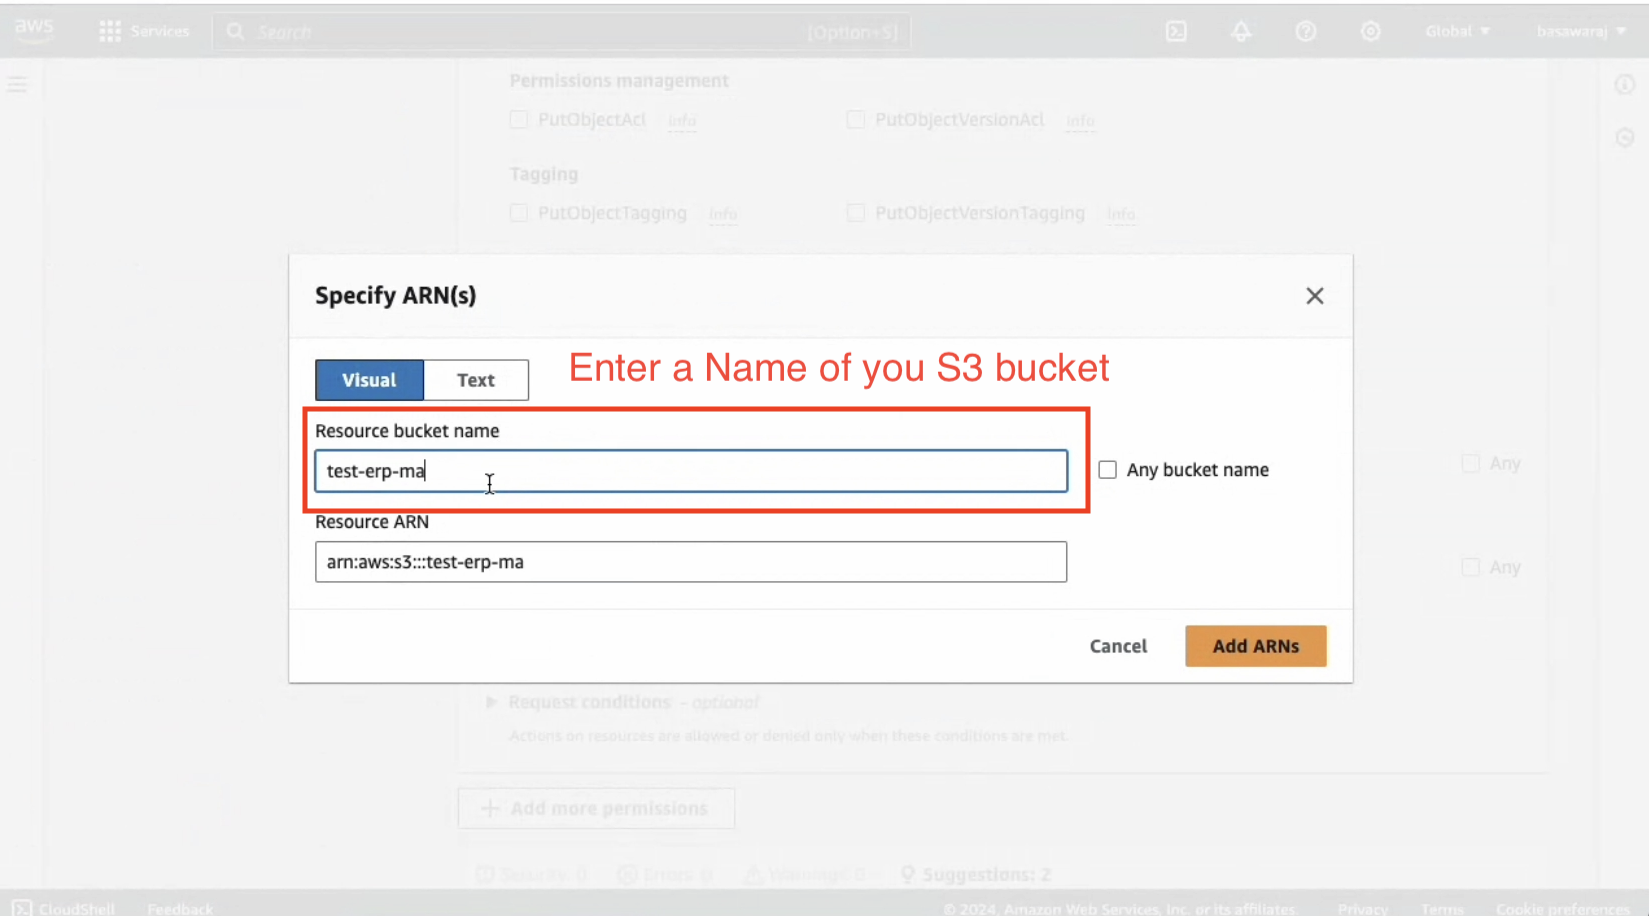
- First, add the ARN for the bucket.
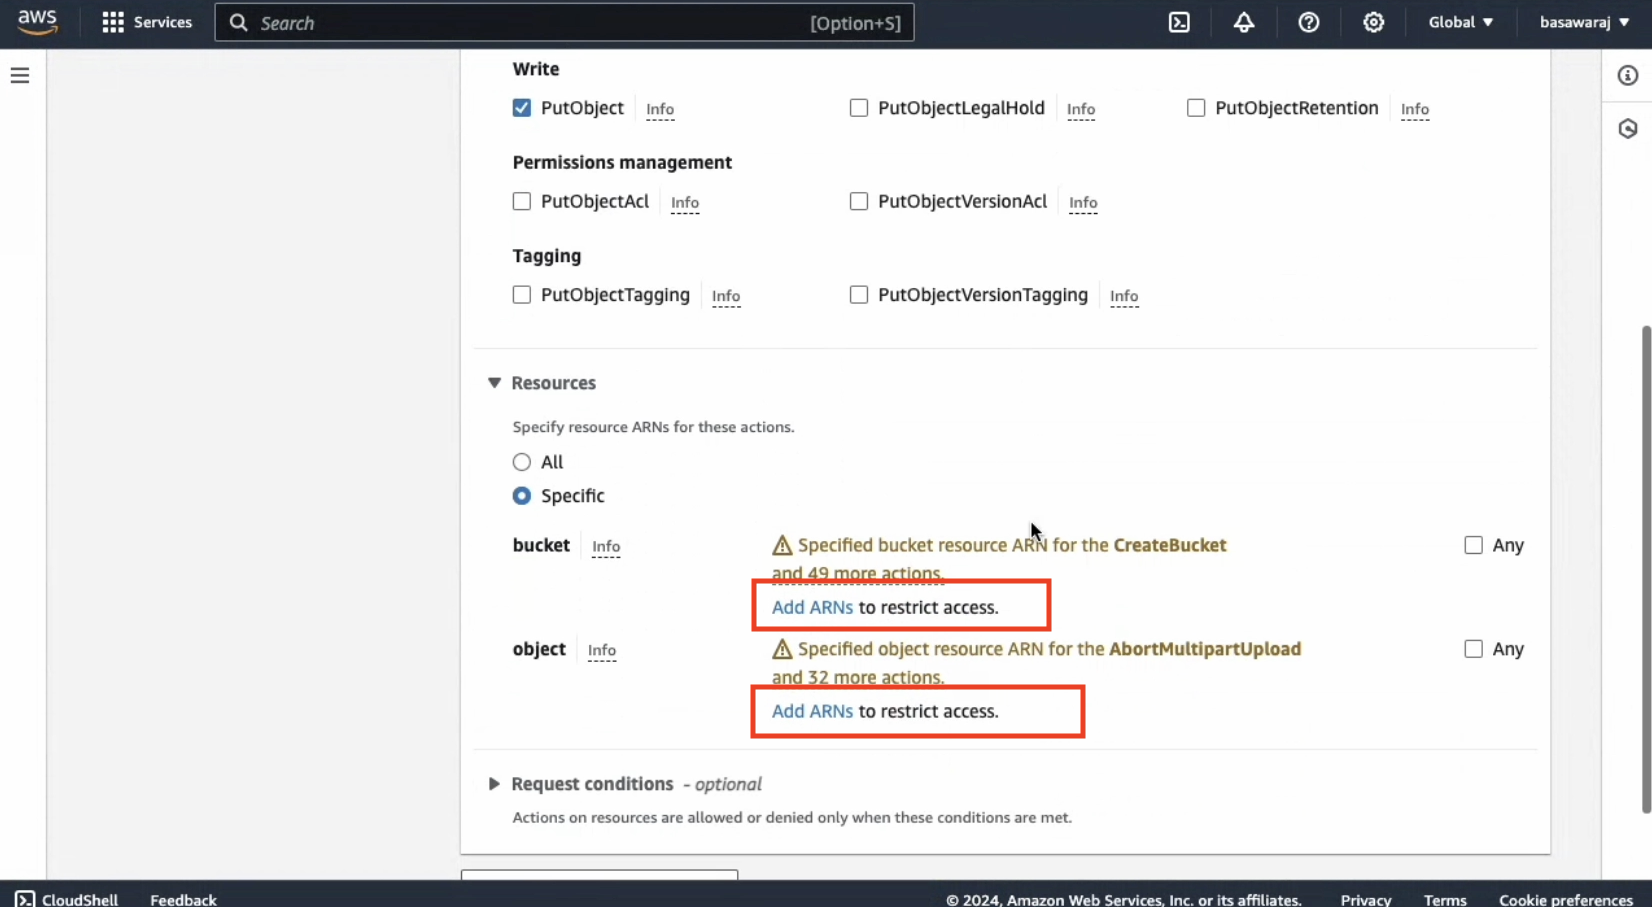
- make sure the bucket name is correct.
- Now, Add ARN for Object

- To name your policy use alphanumeric characters without spaces.
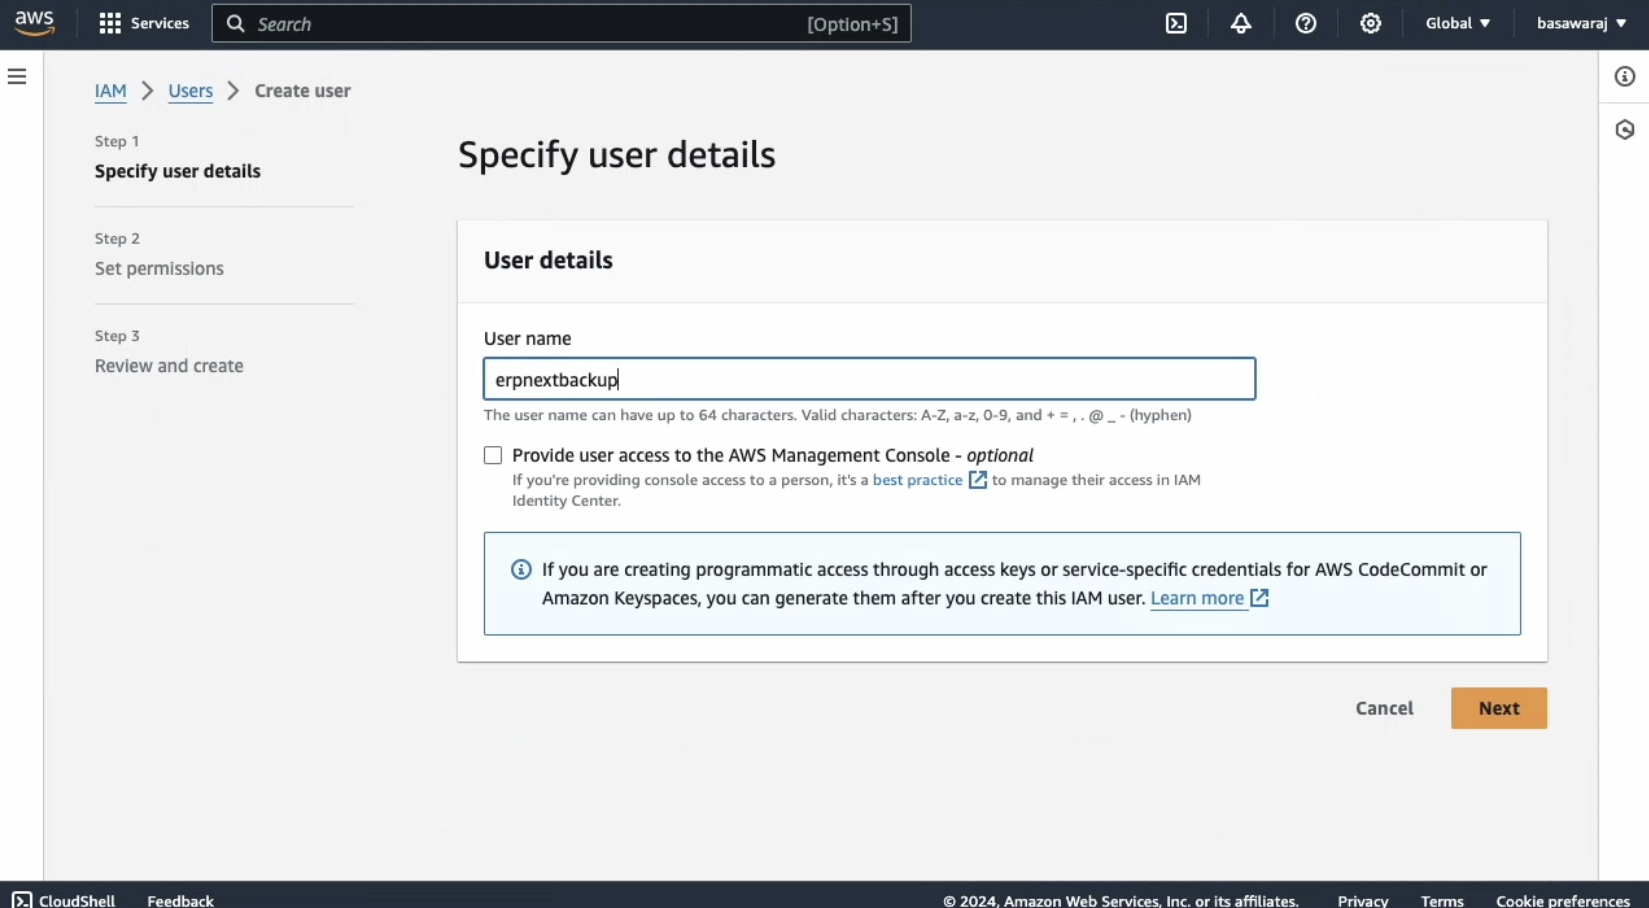
Creating a User
Find the User option in the sidebar or search for it.
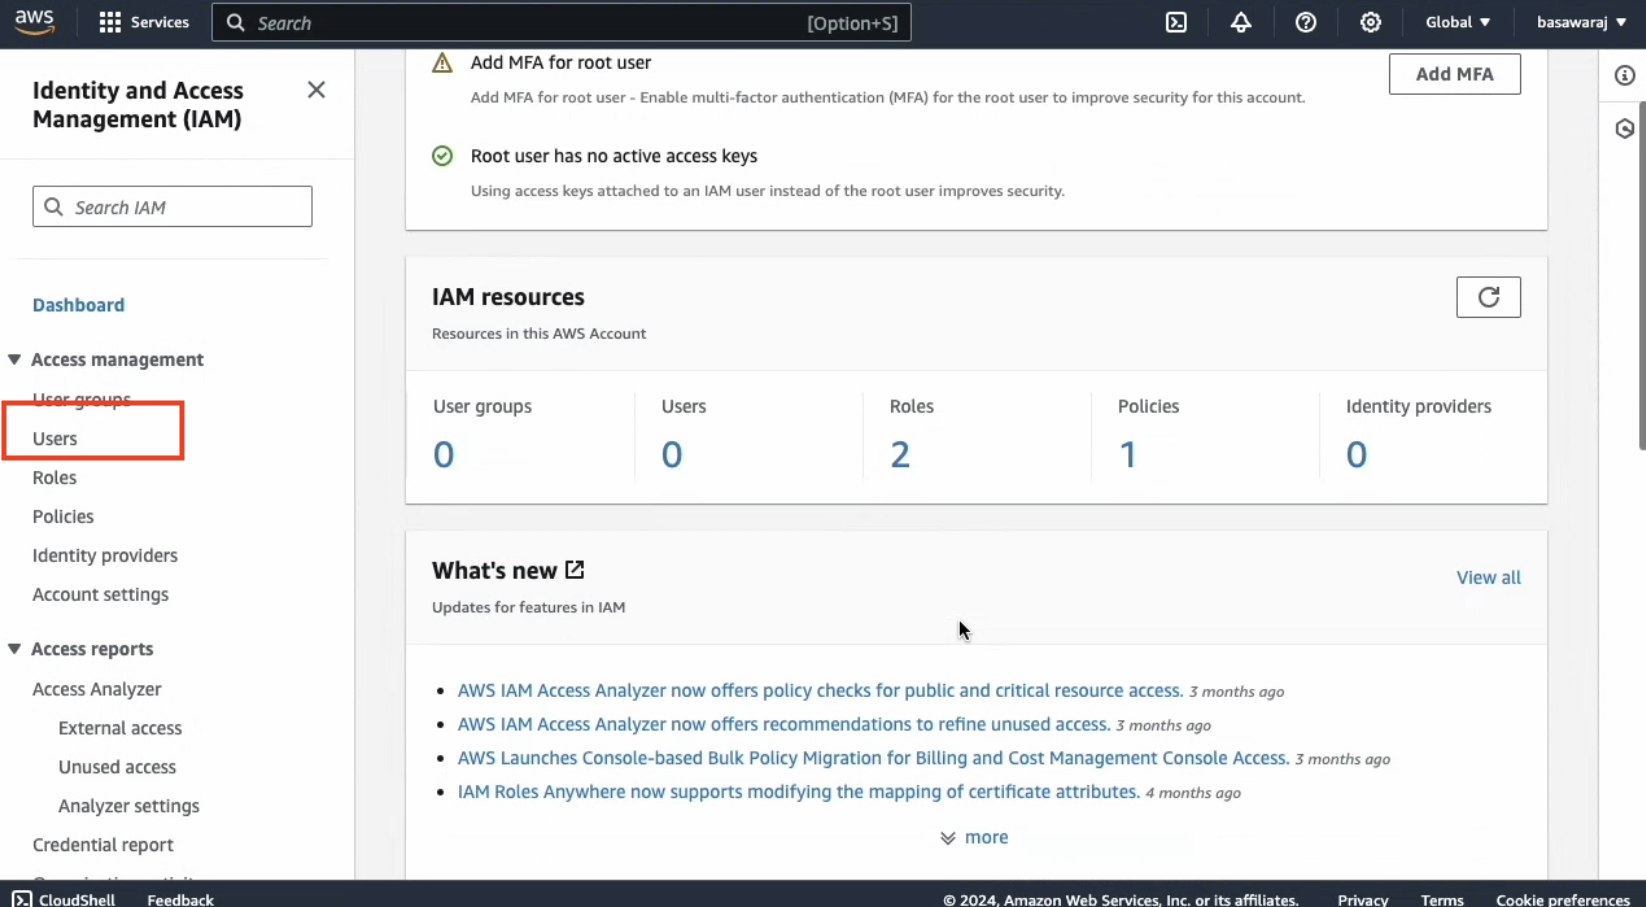
- Add a username and proceed.
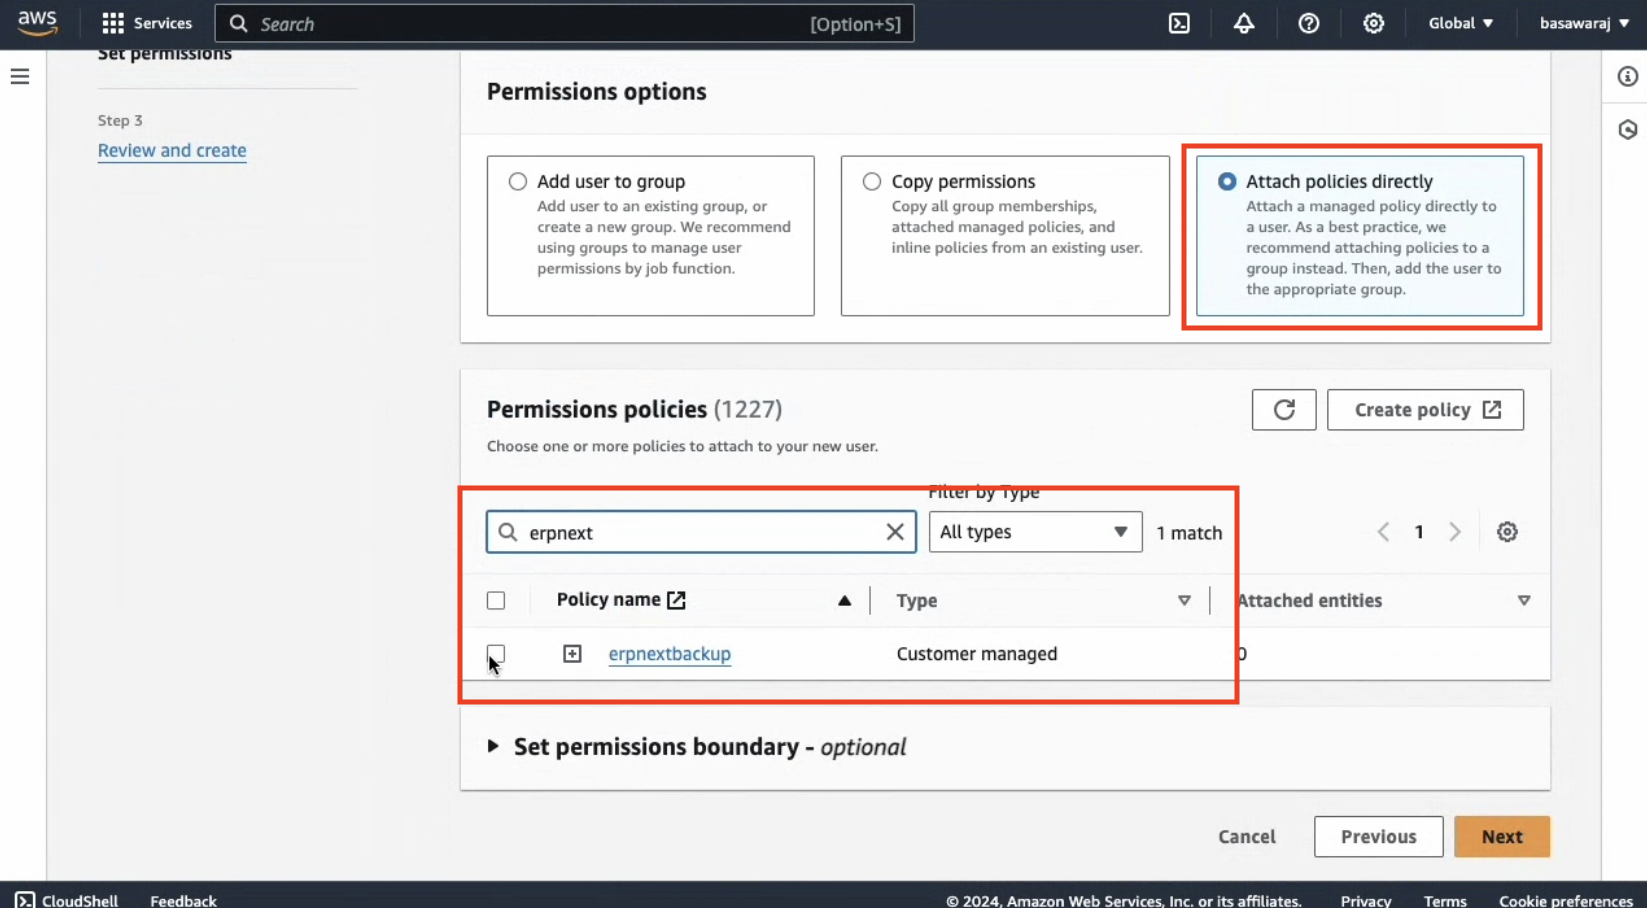
- Attach the policy you created earlier by searching for its name.
- Select the policy and continue.
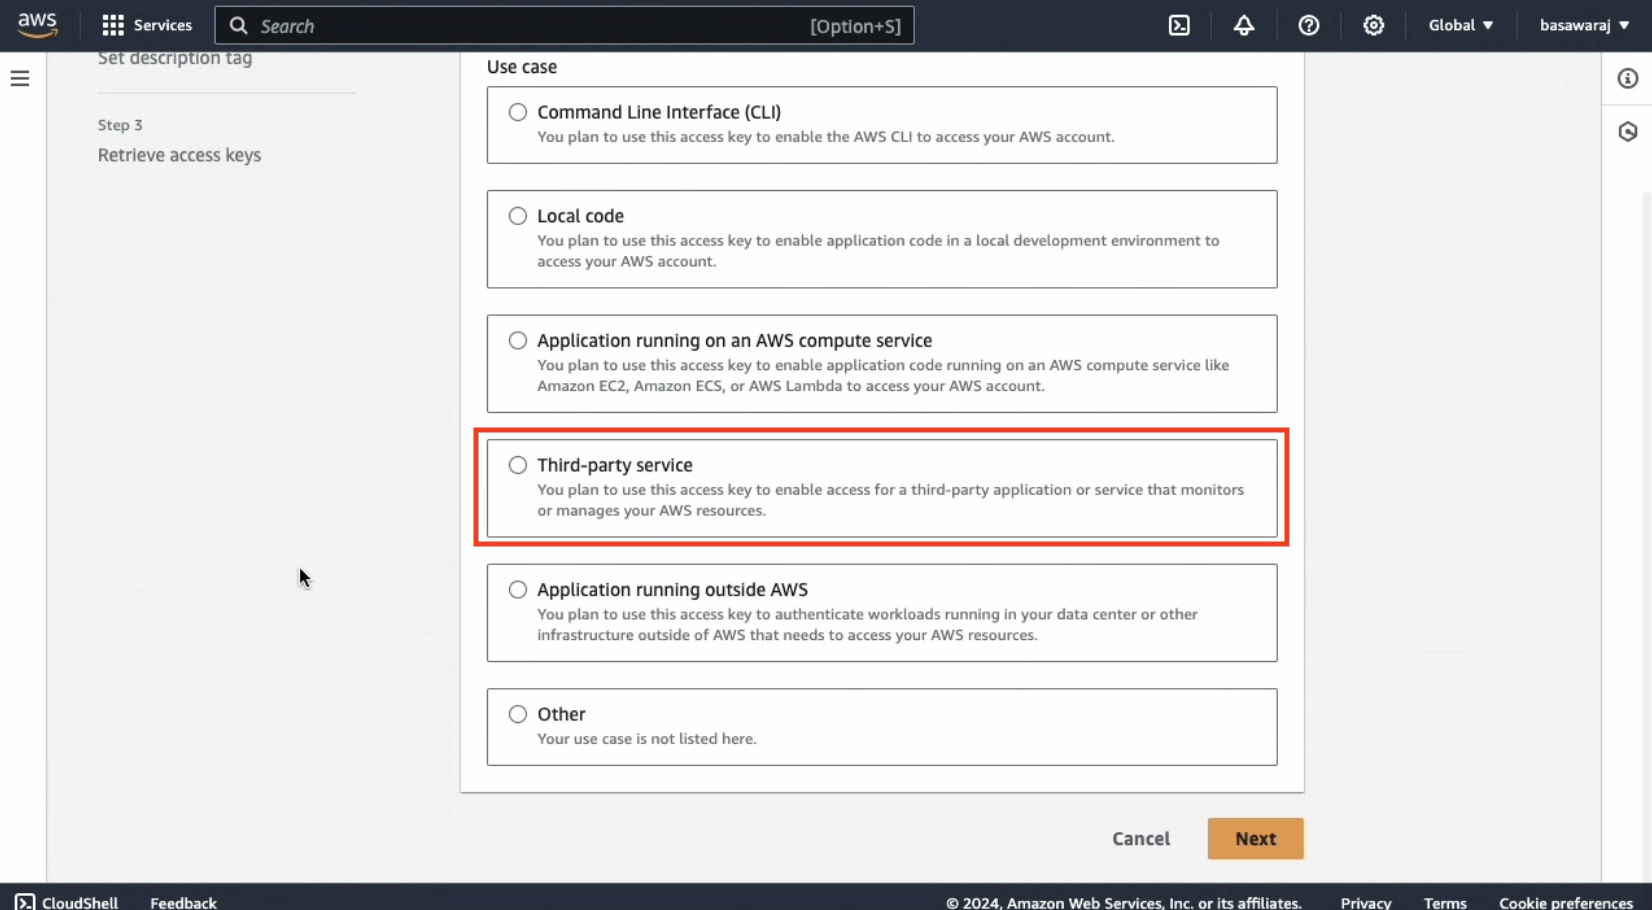
- Select "Third Party Service" and proceed.
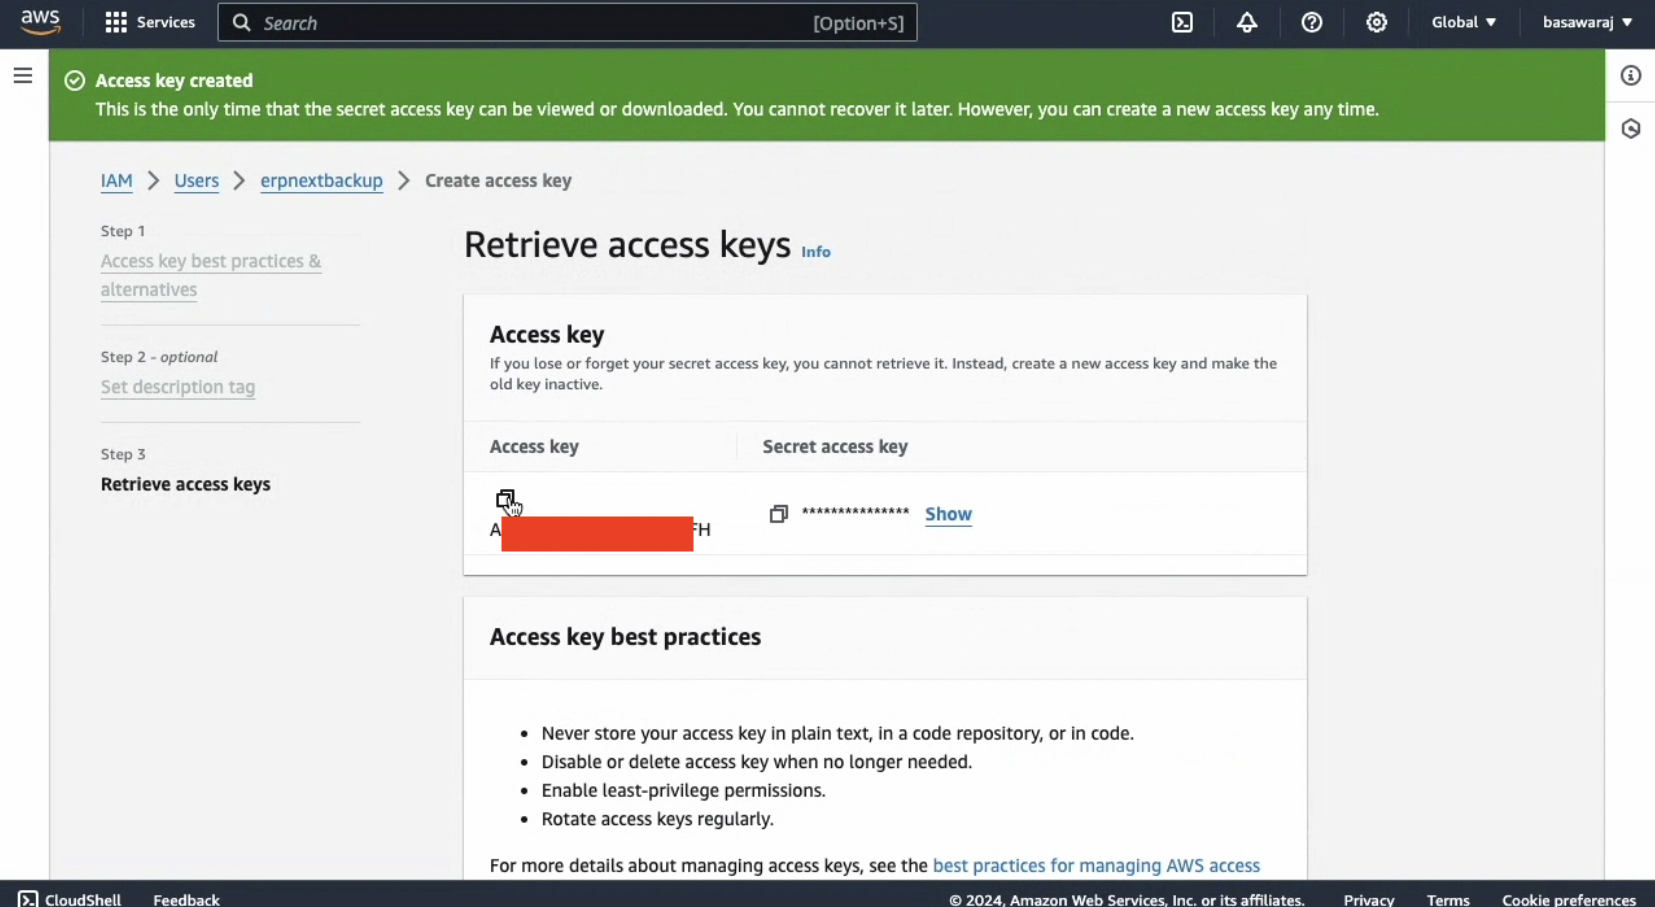
Create Access Key and Secret Code
Click on "Create Access Key"
- Copy the access key and secret code.
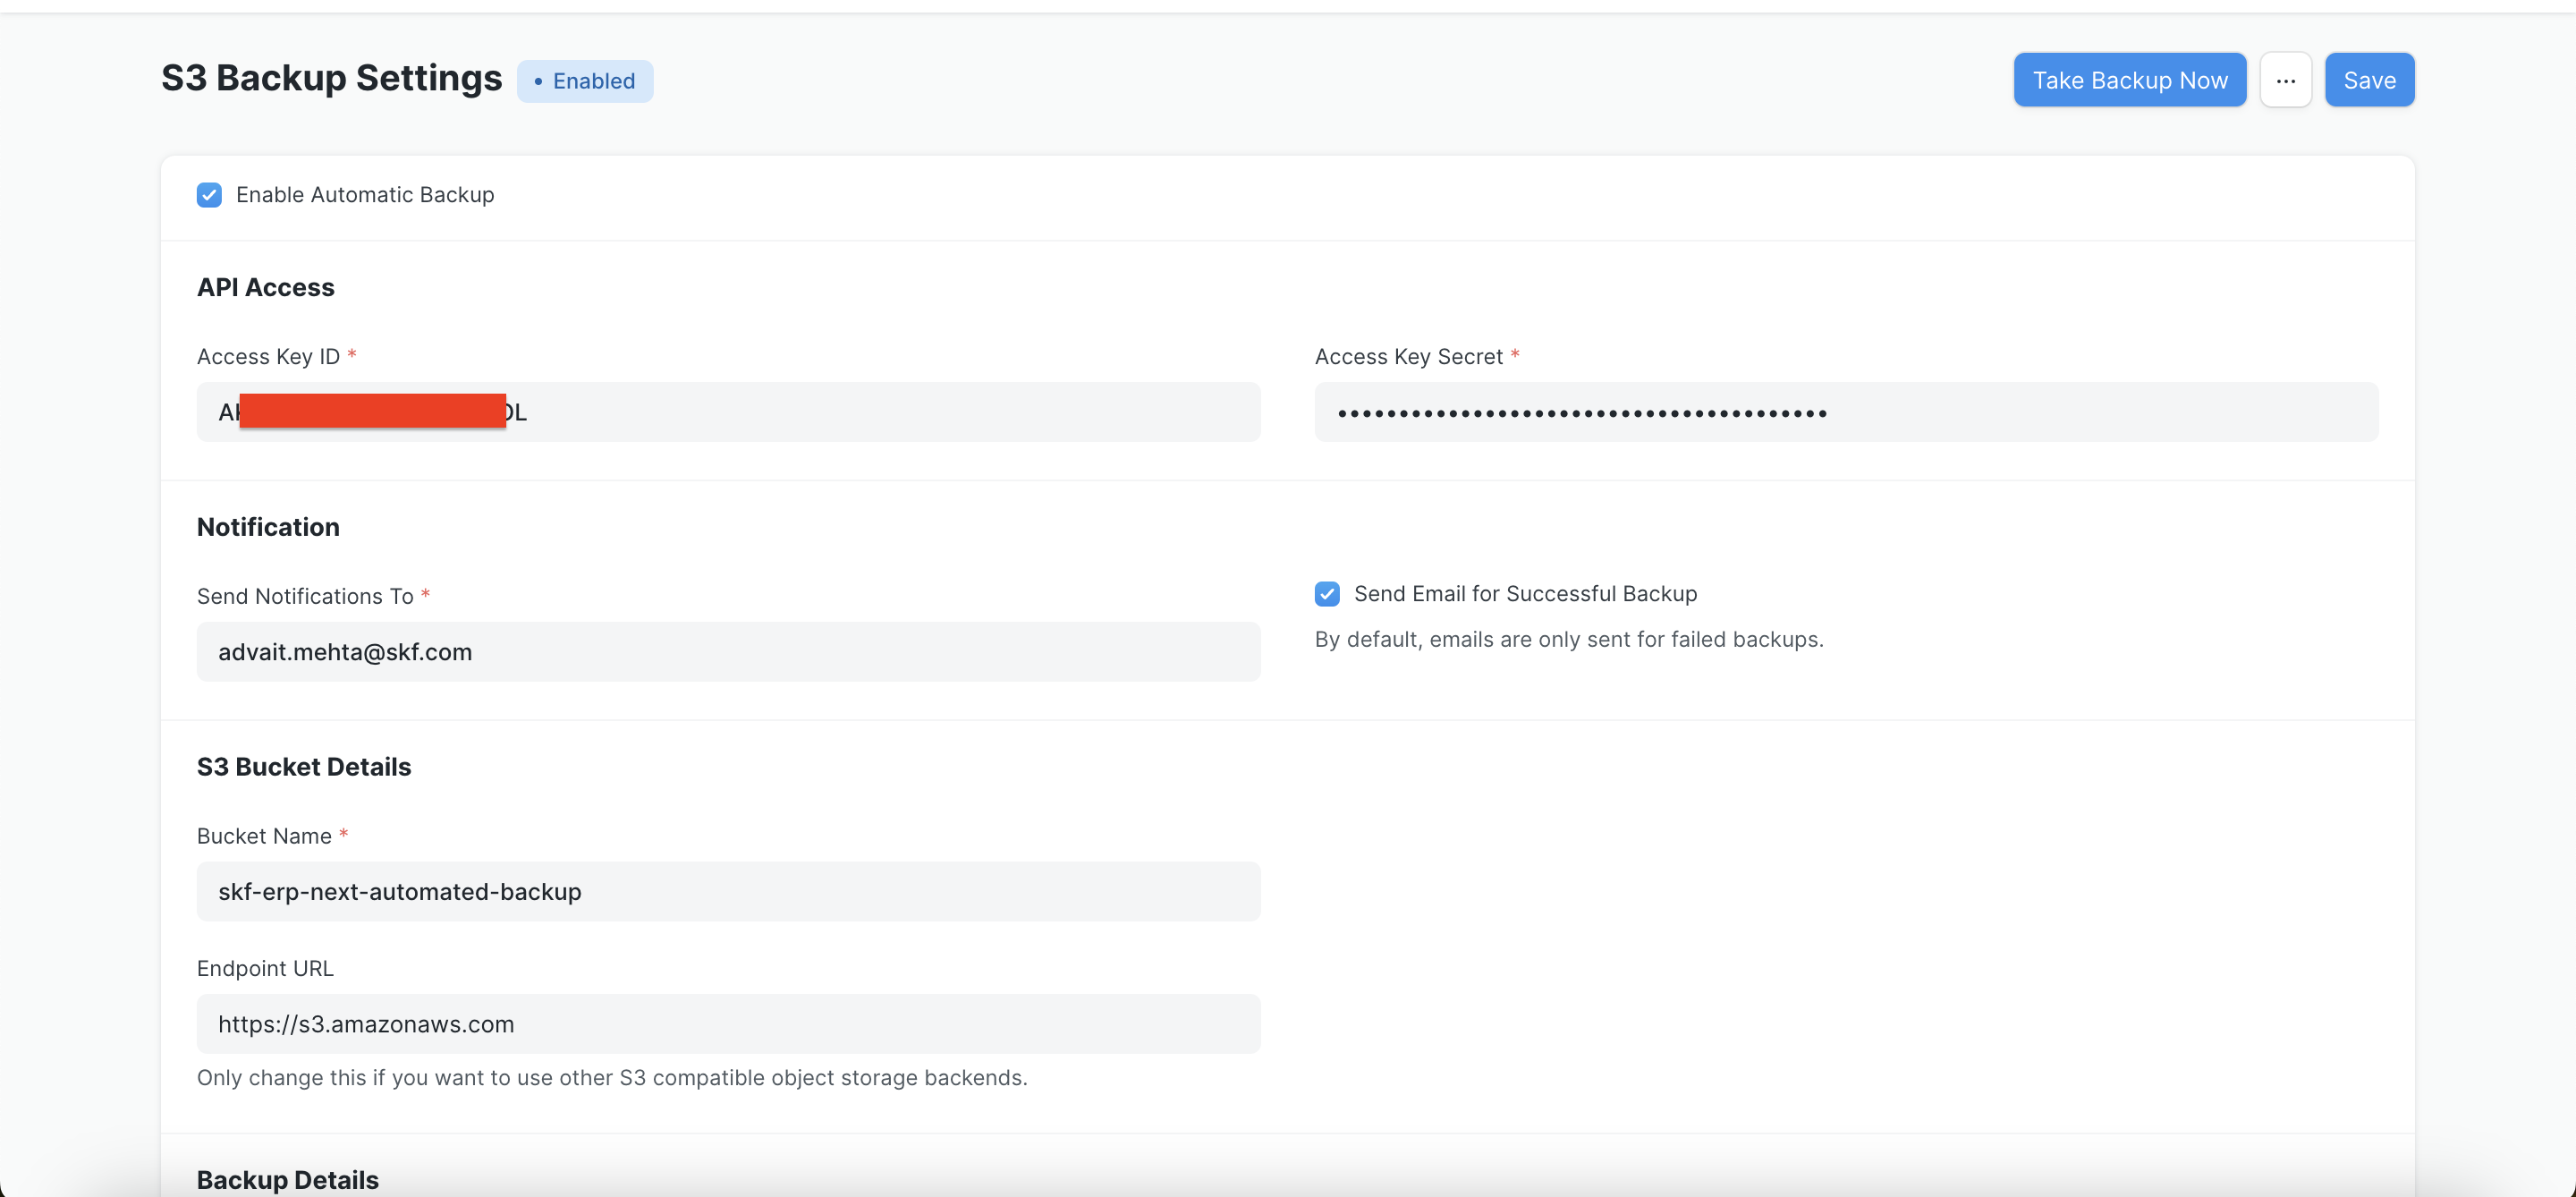
S3 Backup Settings in ERPNext
Configure the Backup:
- Enter the access key and secret code in the S3 Backup Settings.
- Set an email address for notifications upon successful backup updates.
- Configure the backup frequency.
- Specify the exact name of your bucket.
- The default endpoint URL is https://s3.amazonaws.com.
- Check the box for backing up both private and public files.
- Click on Take Backup Now to manually transfer files and test the integration.
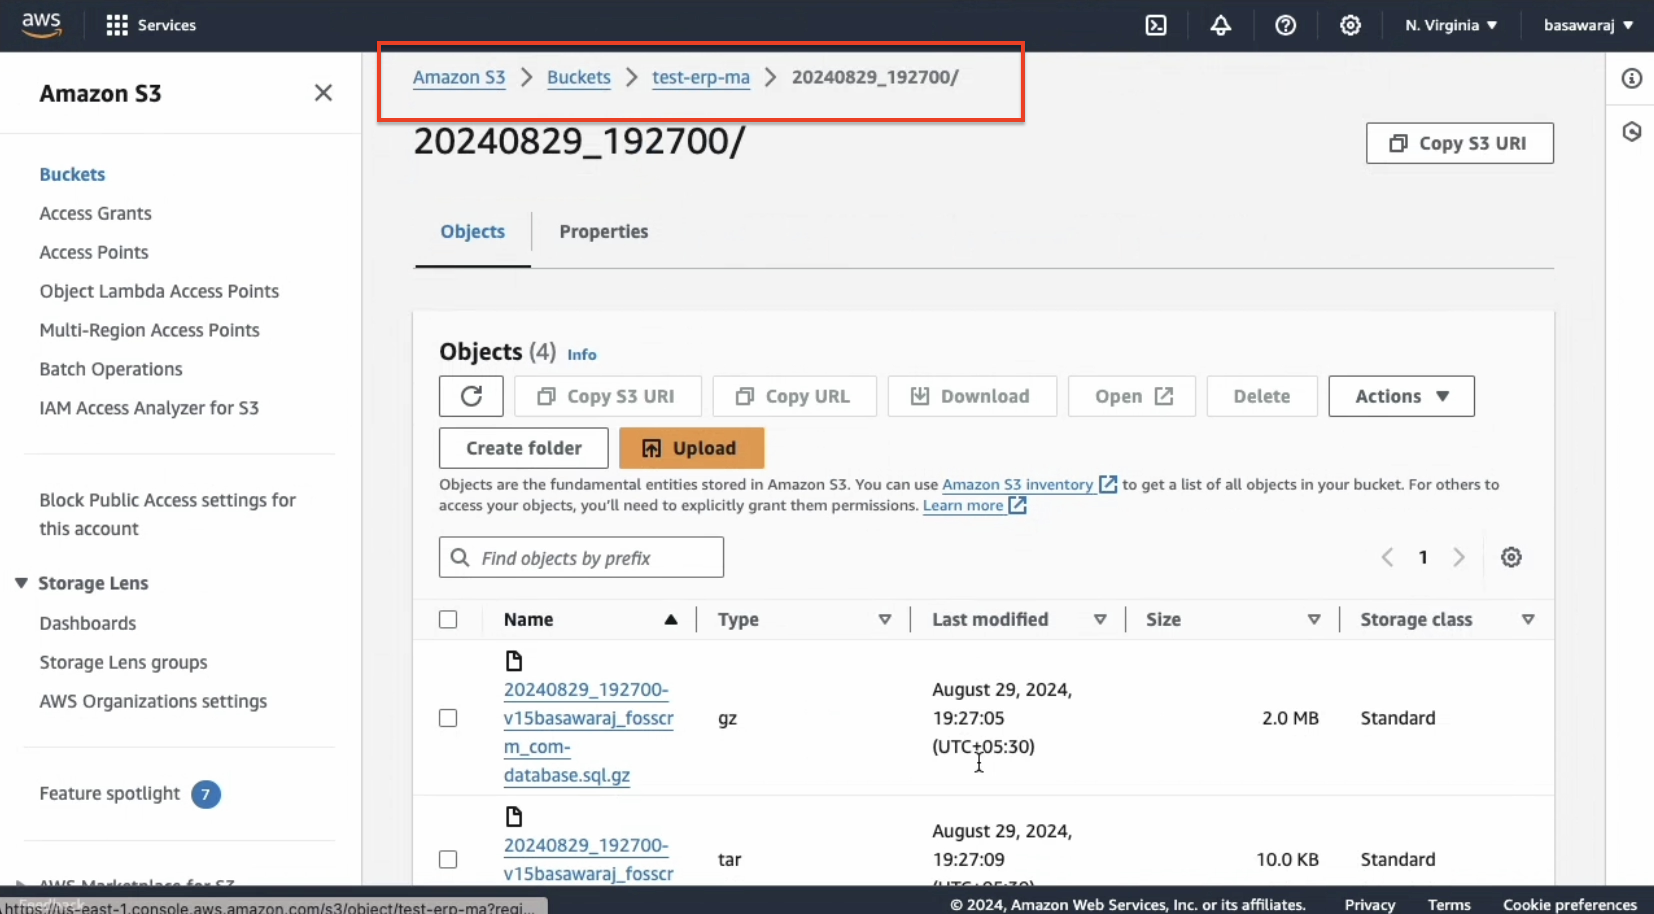
Verify Backup in S3:
- Navigate to your S3 bucket folder in AWS to confirm that the backups are stored as expected.
No comments yet. Login to start a new discussion Start a new discussion